
 By Phil Holden/photos by the author
I got back into model railroading about 12 years ago, after an absence of some 28 years. When I returned to the hobby, I decided that I wanted to create a small HO gauge logging diorama. So, I started with a 2- x 7-foot scene to practice and improve my techniques. A chance meeting, at my local hobby shop, with local On3 logging modeler, Tom Beaton, caused me to change my mind. Once I had seen Tom’s beautiful On3 logging layout, I knew that I wanted to build something larger than a 2- x 7-foot diorama. So, after a fair amount of research, I decided to build a 1930s-logging layout – one that might have existed on Vancouver Island, British Columbia, Canada.
Construction
I began by building a 34-foot-long, 30- inch-wide, series of modules along one wall of our basement. Each module was built on a frame of 1x4s. The rear of each module was attached to the wall, and 1- x 2-inch legs hold up the front. I covered each module with a sheet of 3/8-inch-thick plywood, and drew my track plan right on these sheets.

That’s a saw filer’s shack in the center of this photo. Note the large windows and skylight to provide the saw filer with the best possible light.
Then I cut plywood to form roadbed, and attached it to risers. Micro Engineering code 70 Flex-Trak and Shinohara turnouts were added to the roadbed, and ballasted with dirt. The turnouts are controlled with Blue Point manual switch machines. So far, the layout is wired for d.c. operation, and does not have sound.
Scenery
Scenery was the next big project, and Tom was very generous with his expert help. I used a lattice of cardboard strips covered with plaster cloth to form a scenery base. In areas where the terrain was mostly flat, I used pink Styrofoam for my scenery base.
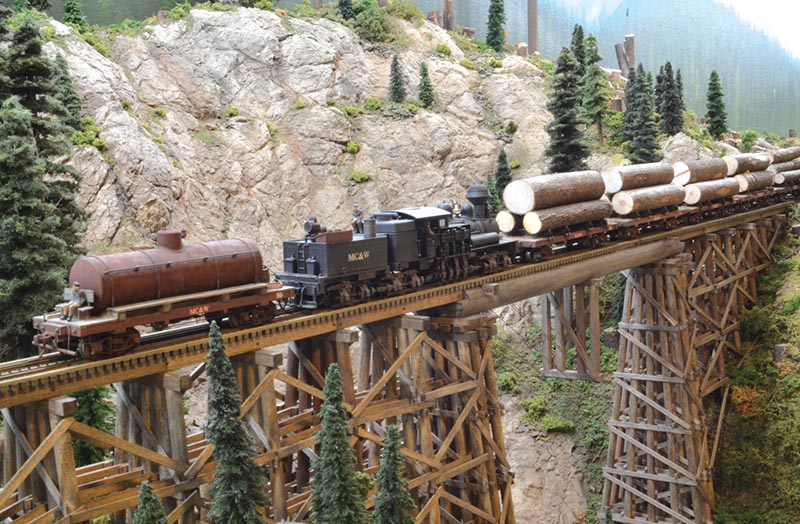
My central canyon scene was made from pink Styrofoam sheets standing on edge. Elevation changes were carved, and covered with cardboard strips and plaster cloth. Two molds were used to cast the rock face in dental plaster. The face was subsequently stained with diluted acrylic paints in spray bottles. The trestle bents were built in a jig, and after they were installed on the layout, I added cross braces.
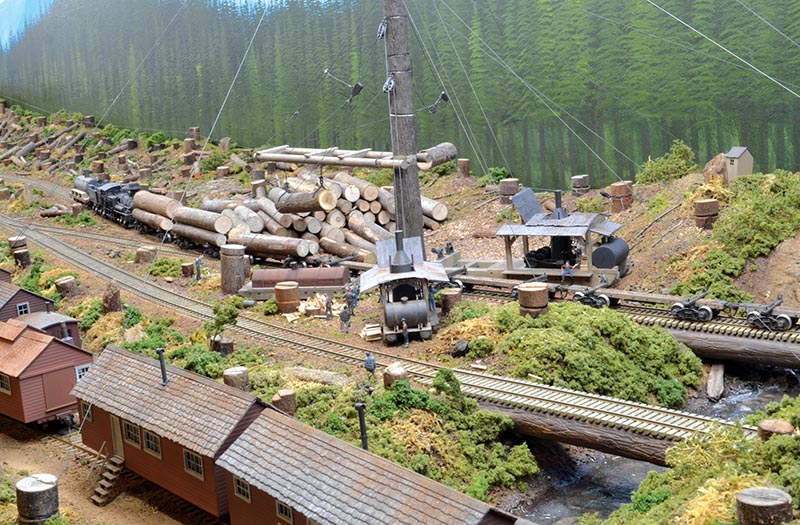
This view of the spar tree shows camp cars in the foreground.
I found most of my scenery material, such as moss, bark, twigs, and leaves, in the woods near my home. Once these items were gathered, I ground them up in a blender – or in a coffee grinder for a finer grind. Using these materials along with some dirt from the woods allowed me to create my scenery. Then I added a variety of ground foam, bushes, shrubs, deadfalls, and trees.
Trees
I “built” my trees from strips of cedar carved to represent trunks – with bark details added using a Riffler file. Then each trunk was stained. The branches were either made from painted pieces of Caspia, or by using a neat method I learned from Tom. He taught me to carve the cedar strips, and then drill the trunks to accept plastic bristles from a push broom.
Once trimmed to the correct shape Tom’s push broom branches were covered with pieces of Woodland’s Foliage, and flocked with lighter shades of Woodland’s Fine Turf. Building trees this way is quick, and the trees are convincing. I have also used Step Moss for foliage producing realistic trees, which emulate a Cedar’s branch structure well. Smaller juvenile trees were made with the tried and true bottlebrush method of rope strands and wire for the trunks, dipped in green paint and flocked…
