

 Chuck Lind/photos by the author except as noted
I would like to dedicate this article to the late Bob Brown. After seeing this building in the NMRA magazine, Bob contacted me about doing an article about the structure. I agreed and said I would put something together. After another gentle nudge, I started working on the article off and on, sorry to admit more off than on. So after I received the notice about his death, I decided I need to finish as promised.
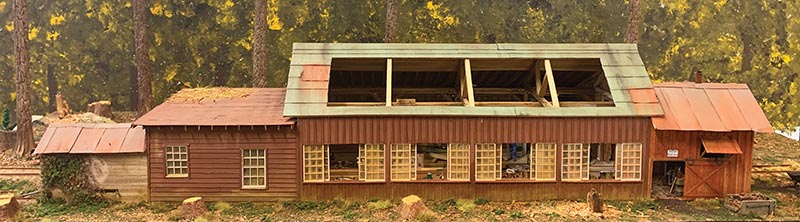
Overall view of the completed model. While the West Side had very few windows, I modified the design by adding a bank of windows so interior detail could be viewed.
The Tall Pine Lumber Company models are set in 1938, so most of the equipment is built from wood. I closely follow the West Side Lumber Company in building my rolling stock since plans are readily available. With all the wood cars, and since we are in the lumber business, I figured it was time for the Tall Pine Lumber Company to have a car building shop. Since I follow the West Side for my cars, I decided to look at their car shops. Their first shop was completed around 1905, and was a very simple one-stall structure. I liked the various roof angles of the building created by the various additions over the years. Looking at what I assume is the original building, it looked like timber frame construction with three or four additions built over the years. Using a Russ Simpson drawing of the car shops, I was able to come up with a plan for my model. Since this would be located close to the edge of the layout, I made the decision to have a complete interior. With this decision I wanted to add lots of windows along the front edge and I would also leave part of the roof open for better viewing.
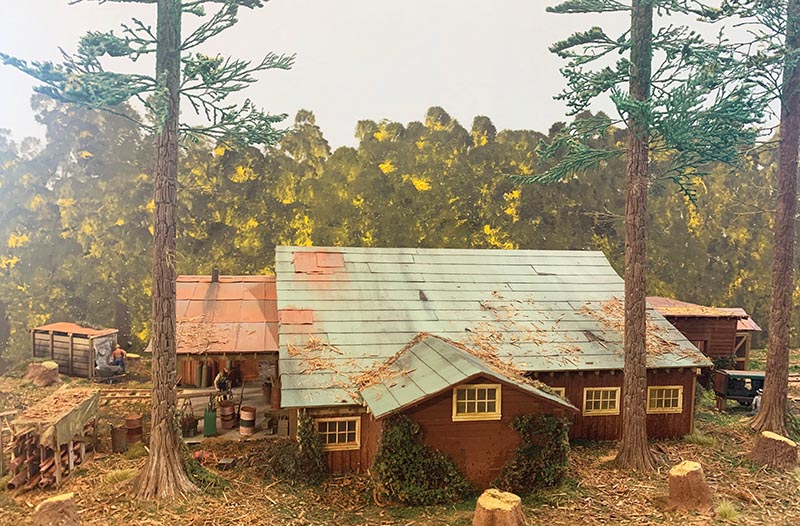
Overall view of the rear of the car shops. I covered the area outside the blacksmith shop and added other details like the pipe rack and the vehicle by Sierra West.
I decided to build it up in stages, adding each addition as I built it. I drew out the floor on a large piece of Gator board and positioned the ties, track, and joist for flooring. I next laid out the timber frame construction of the walls and roof truss system. The main timbers and angle supports were cut and glued up, holes were drilled, and toothpicks inserted to give the look of the pegs used to hold the framing together.
Since I wanted lots of windows, this was the time to figure how they would fit into the front wall. I found some large windows I had laser cut when I built my sawmill and decided to use them. They are sliding windows so I put a groove into some scale 6˝ x 12˝ timbers so the windows would slide. Board and batten siding was added to complete the outside wall.
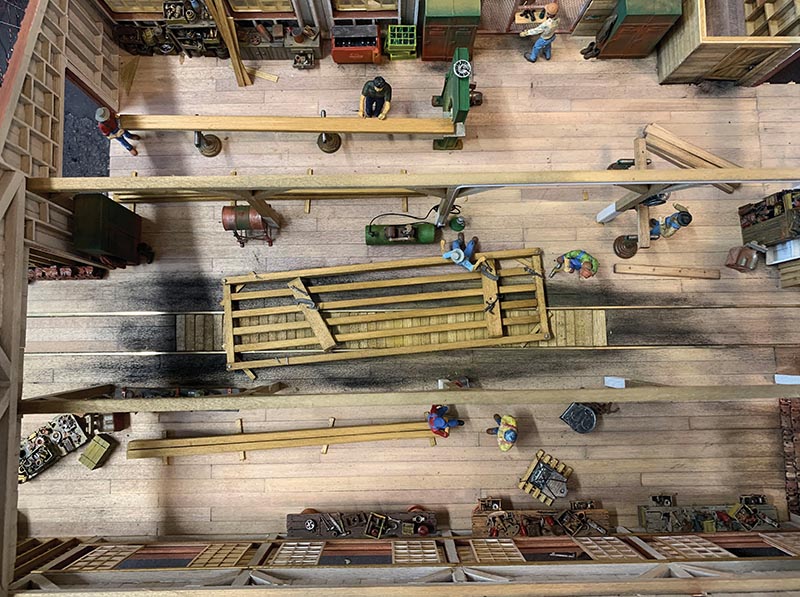
This is an overall shot of the interior with all the detail pieces installed. At the bandsaw, they are cutting the lap joints for the next car. Another worker is at the drill press drilling holes in the end beams for the truss rods. Lots of activity as another frame gets ready for completion.
The next issue would be the first rear addition. It looks like it was a type of stud wall construction, so plans were drawn and the wall was assembled over the plans. The second rear structure was a small room with a lean-to roof. The various roof types took a little trial and error to figure out how to merge the different construction types together. My assumption was that part of the original roof timbers were left in place and the new roof rafters were attached to those. After figuring the roof angle, a styrene jig was made so the angle could be cut on my table saw…