
 by Gary Bothe/photos by the author
Shortly after it was introduced back in 1980, I purchased a Grandt Line On30, 18-ton Porter kit. Grandt Line produced the kit in On3, but sold them with On30 drivers and instructions on how to narrow the frame. I assembled my kit to the point where I could test-run it, but then for reasons lost in the mists of time, it got put aside in favor of some other project. Recently, with a lot of pandemic isolation time on my hands, I found it again and decided to finish it and upgrade it to DCC with a Tsunami 2 sound decoder. If you have one of these locomotives or something similar, and want to do the same, you may find the following information helpful.
In its not-quite-finished state, my model was fairly easy to modify. But even with a Porter that is already finished and running on DC, the process I describe here is still quite doable. The model can be reduced to its major components by removing the screws under the cab and cylinder block. The smokebox and smokebox front are press fits into the rest of the boiler, and if you followed Grandt’s instructions, as I did, and did not glue them when assembling the kit, these components can be detached, detailed, and painted individually, making the upgrade work a lot simpler. Leaving them unglued now also allows easy access to headlight wiring in the future. If these parts are glued on your model, you can still work around them to accomplish the DCC conversion, although headlight wiring will be a little fussier. If you glued the saddle tank to the boiler, however, it would need to be taken off.
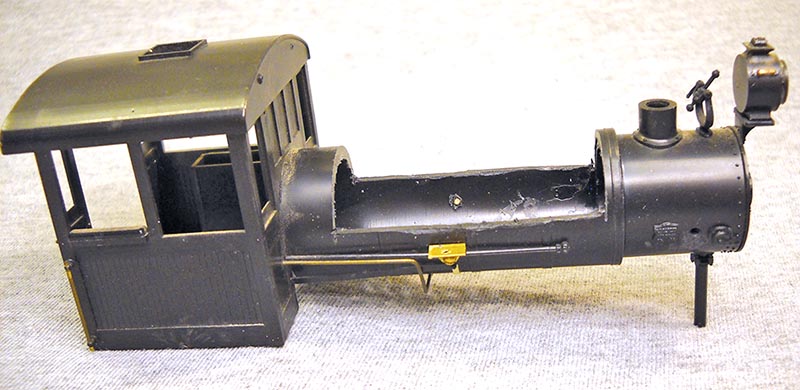
ABOVE: After removing the saddle tank, the top of the boiler was cut away, and previously installed boiler weights were removed to make room for the electronics package. Brass brackets screwed to the side of the boiler will secure the saddle tank.
After removing the saddle tank, I cut away the top portion of the boiler covered by the tank. I had previously glued some lead weights into the boiler as recommended in the kit instructions, and these had to be removed as well. I then drilled a line of holes in the bottom of the boiler where the speaker would be located, and some more holes in the back of the saddle tank. None of these holes are visible when the finished model is viewed from any normal angle. The holes allow sound to escape from the boiler-mounted speaker, and also allow some ventilation for the decoder. The intent is for cool air to enter the bottom of the boiler and then have warm air exit at the top through the saddle tank holes, taking some decoder heat with it.
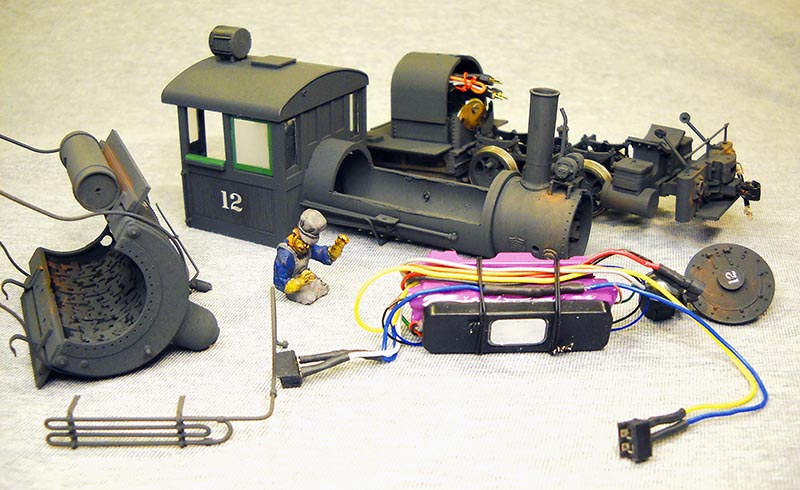
ABOVE: Major components of the Porter ready for assembly. Note the plugs for wheel pickup and motor wiring projecting from the motor cover. This cover was left off during assembly to facilitate handling the wiring connections and then replaced, with modifications, after final assembly. The engineer had to be modified to get him to fit into his extremely tight position in the cab.
With boiler weights removed, I added as much replacement weight as would fit to the inside of the saddle tank and smokebox. Since the tank could no longer be secured to the boiler as originally designed, I made a pair of brass angle brackets to attach it to the bottom portion of the boiler with 00-90 screws. This allows the tank to be removed for easy access to the electronics…
