 Review by Bob Brown
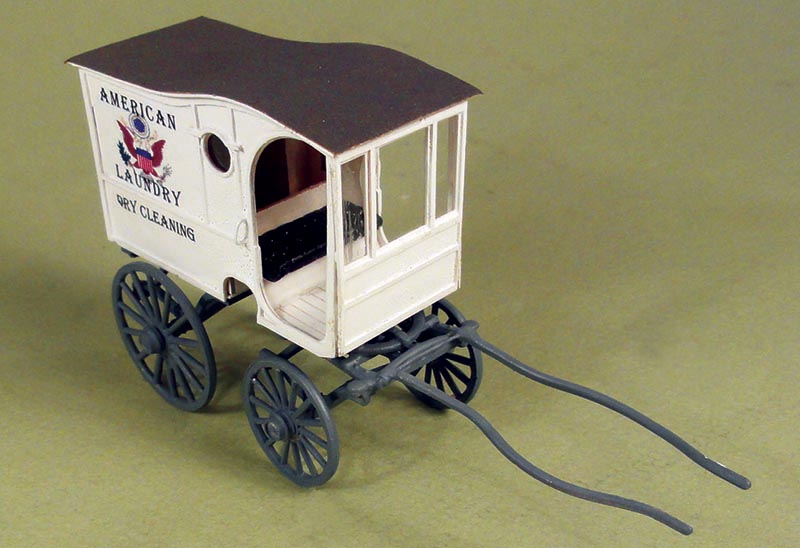
Berkshire Valley’s O scale American Laundry Wagon is their fifth wagon kit. I found the photos and drawings made this an easy, but delicate, kit to assemble., and sells for $29.95 each. I reviewed their first three wagon kits in the November/December 2017 GAZETTE, and mentioned that I found assembling the leaf springs tricky. I reviewed their fourth wagon in the July/August issue, but that wagon did not have leaf springs, and was easier to assemble. When I received my Laundry Wagon kit – with leaf springs – I knew I had to do something to make assembly easier. So, I made a simple little jig – and assembly was a breeze.
My problem was that the axles flopped around while I attached the springs. So, I glued two strips of wood to a piece of Gatorfoam to hold an axle nice and snug. My jig is on the right in the photo below. A piece of double-faced tape might also work. With the axle in place, I put a drop of ACC in one of the holes at the end of the axle where a leaf spring was to be attached. Then I placed a leaf spring in place, using the little locating peg cast into it. I held the spring until the ACC began to set, and then let the ACC cure. I did the same thing at the other end of the axle. However, beware! One end of each spring has the attachment “claw” pointing up; the other end has it pointing down. Make sure the ends of both springs are correctly oriented.
After the ACC had cured, I placed my spring and axle assembly upside down on a little block of metal (on left in photo). The attachment claws have to be up in this position. Then after making sure my claws were clear of any flash, I put a drop of ACC on each claw, and dropped the transverse leaf spring assembly, in place and let the ACC cure. Then I did the same thing on the front spring and axle assembly.
Next, I drilled out the wheels, mounted them on the axles, and added the “hubcaps.” The rear spring assembly “plugs” into a laser-cut wood frame. Mine fit perfectly, so I sprayed both spring and wheel assemblies and set them aside to dry. The body of this wagon is laser-cut from thin laser board. The instructions call the body “delicate,” so a slightly heavier laser-cut, tab and slot, inner body is provided for strength.
The outer body and trim are added next, and the body, painted. I left off the front of the wagon and, the rear doors, so I could add the acetate window material after painting. Then I glued on the front – and the rear doors, and added a tarpaper roof, and the decals. Once the wheels, axles, and springs were glued on, I had a wonderful little Laundry Wagon. The instructions were clear, and I found the photos and drawings made this an easy, but delicate, kit to assemble.
Berkshire Valley Models
P.O. Box 1666
Fenton, MO 63026