 By Gregg Condon, MMR/photos as noted
My wife, Pat, and I stood at the bottom of our basement stairs. To our right was the recently completed crew lounge. To our left was the empty train room—a blank canvas, as it were, upon which to paint a layout. She said to me, “I suppose right here will be the end of a peninsula with the track running around the edge of it!” I replied rather mindlessly, “I suppose so.” She said, “Everybody does that; it’s a cliché in model railroading!
Your peninsula will be nearly 40 feet long; you’ll never miss three feet of run, move the turnback loop away from the end of the peninsula and mask it in a cut; narrow the end of the peninsula into a teardrop which will be eye-appealing and improve traffic flow into the aisles. Then build your signature mining scene right here where it will be the first thing visitors see.” This from the astute eye of a lady who has never built a layout but has visited many. I had to agree with her on all counts.
While I purport to be modeling the Rio Grande Southern—and mostly I am—this scene is pure fiction. I built it to be representational of mine scenes across Colorado. I named the place Silver Spur. In building the mine and mill I followed a prototype—sort of.

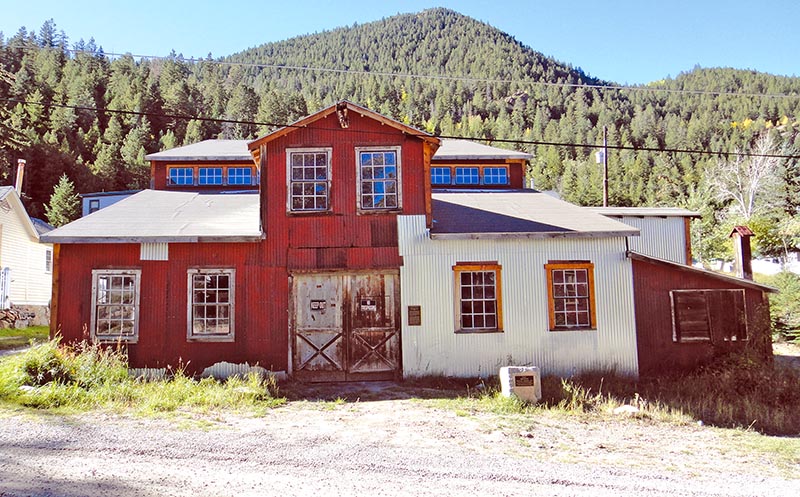
ABOVE: The front of the Centennial Mill appealed to the author as a good model-building candidate.
CENTENNIAL MILL
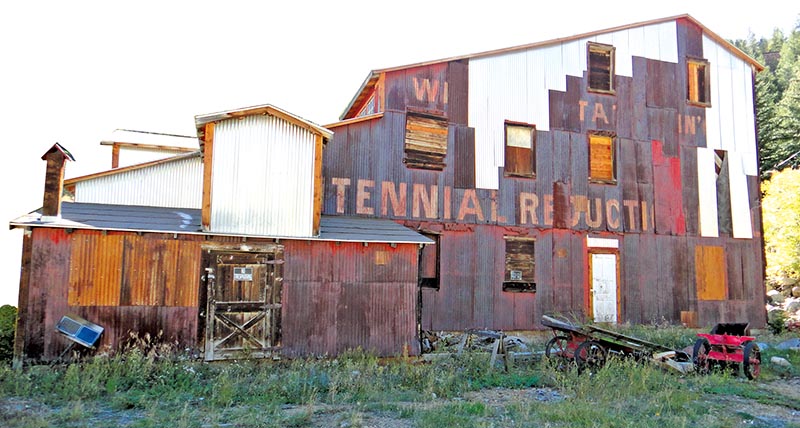
On a visit to Georgetown, Colorado, in 2010 I noticed again the Centennial Mill at the south edge of town. I’d given it scant attention on many Georgetown visits over the years, but suddenly I realized how rare a Colorado ore-reduction mill has become! The first photos show the mill. It’s rare that a mill has been maintained. Apparently about half the corrugated siding has been replaced to the extent that the original lettering is barely decipherable.
I never intended to model the Centennial Mill per se. I didn’t bother to take any measurements. I figured I could calculate dimensions off my photos and good guesses would be close enough.

ABOVE: Fortunate repairs to the mill contrast with the original siding and lettering.
SILVER SPUR MILL
My model mill, Silver Spur Mill, is based upon the Centennial Mill. It’s not a scale model of it. My overall objective in building my RGS layout is to capture the spirit of the prototype. I consider the depots to be focal points, and so all five of my RGS depots are as faithful to prototype as I could build them. Beyond the depots, some things are “pure” prototype, and some are representational fiction. I’m trying to portray 30-40 miles of prototype in 3-4 scale miles—something’s gotta give, as the old song says.
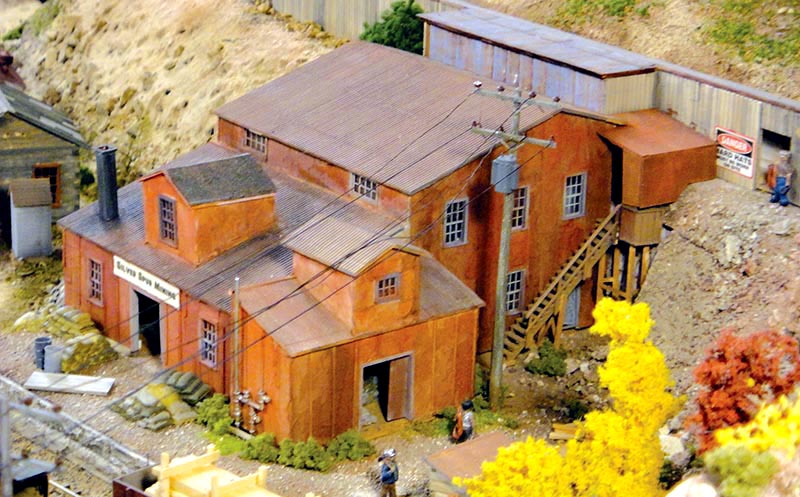
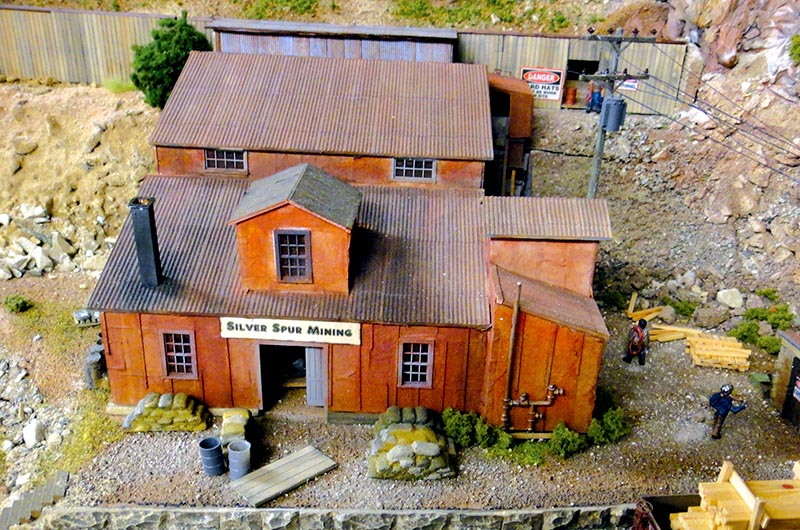
Three photos show my model of the Silver Spur Mill. To build it, I pawed through my boxes of window castings until I found some that looked like the Centennial windows. I started at the corner of a sheet of paper and placed the windows in an arrangement that looked like the front of the Centennial. I guessed that the center door was eight feet square. I laid a scale ruler under my row of windows and concluded that a structure width of 36 feet would work. Looking at the prototype photos again and trying to keep a sense of proportion, I quickly concluded that the building’s footprint would be 36- by 48-feet.

ABOVE: The author imagineered an outside stairway leading to the snowshed over the mine track.
For structure height I felt that the front wall should be ten feet high. By eyeball, I decided that from ten feet at the front, the roof would slant up to 15-feet above the ground at the base of the clerestory wall, and that it should be 22-feet at the top of the clerestory wall and rise from there to 28-feet at the peak toward the rear. I jotted down those numbers and started cutting out parts. Not only did I not make a scale drawing of the structure, but I also didn’t make any pencil marks on the building material. I used to do that: calculate where the ruler should be, pull a pencil along the ruler, and then pull a hobby knife along the pencil line. Then it occurred to me: if the ruler is in the right place, forget the pencil and just pull the knife along it—make the cut and get on with the project!


